If you're new to wearing + installing lace front wigs at home, you'll want to read all about how I installed this beautiful loose wave lace wig I've been wearing lately as a protective style. While this post is a paid partnership with LUVME Hair, all thoughts and opinions about the hair + experience are my own. To read more about my disclosure policy, click here.
As I've mentioned before, I love wearing wigs and weaves as a protective style for my natural hair. Installing them at home saves so much time and money! And while many may think installing a wig at home is time-consuming for a beginner, I promise you it's easy-peasy! The style I'm sharing today is very beginner friendly, as you can get it already colored and pre-plucked. You also don't have to use any glue to apply this one, because I don't use glue on mine. I'll walk you through how easy it is to do so.
About LUVME Hair Lace Wigs
If you aren't yet familiar, Luvme Hair Wigs are known for being one of the most high quality lace wig brands you can purchase online. Not too long ago, I shared with you guys how much I love my everyday headband wig I received from them. The brand prides itself on quality hair, quality service, and making each customer feel beautiful with each purchase. There is an array of options for customers, from headband wigs, undetectable lace, glueless wigs, to dyed + pre-plucked wigs for those of us who want the "look" without the hassle.

Wig Specifics
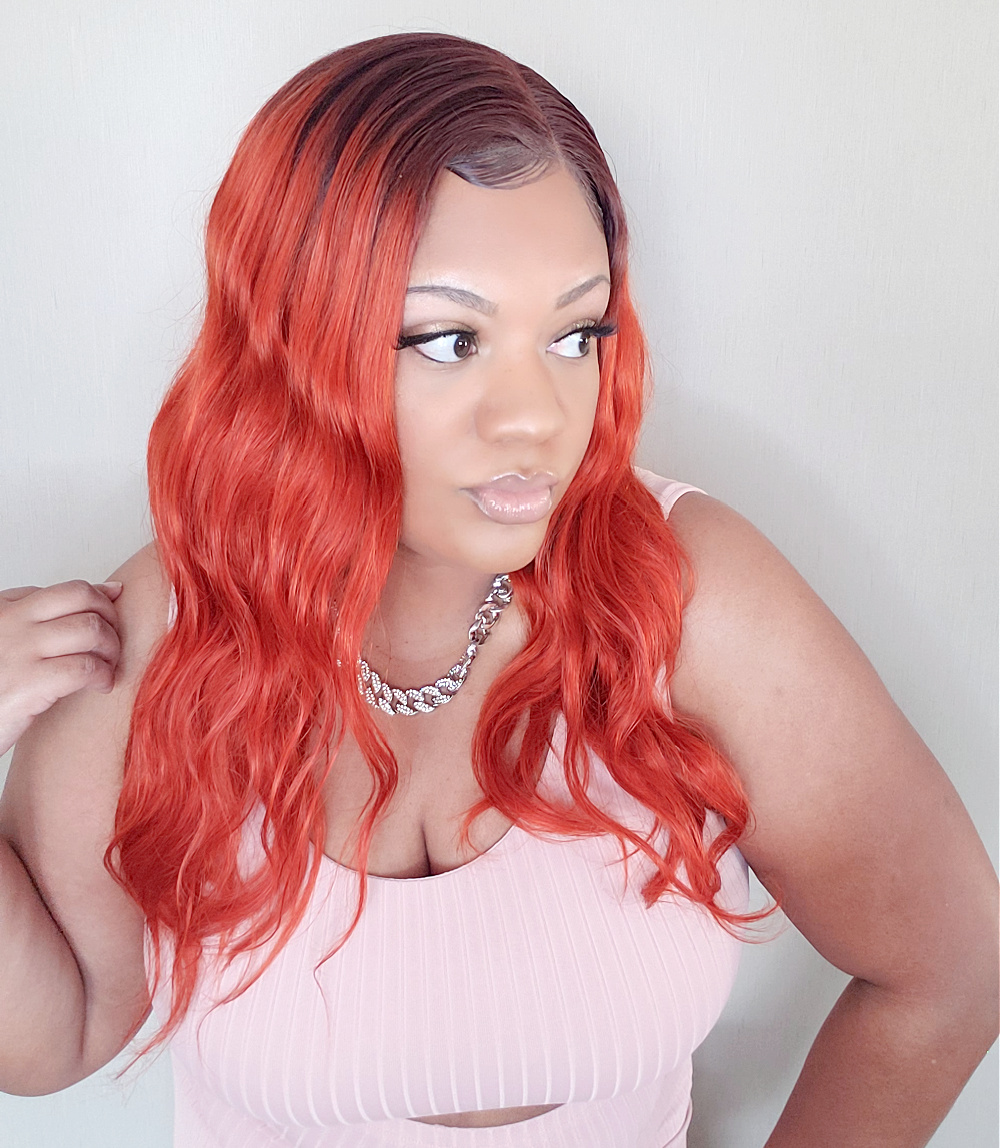
The style I am rocking here is the beautiful Reddish Orange Loose Wave Lace Wig With Dark Roots. The wig is 100% virgin hair with 180% density. The loose wave is a soft, smooth texture that also curls and straightens beautifully, depending on how you choose to wear it. In the top of the wig, there are three combs, and in the back it contains one at the nape near the adjustable straps. The closure is 4x4 and it contains an elastic band. The cap is light and breathable and the hair is full with a realistic density. This wig can be installed without glue, has been pre-plucked and has a natural hairline-- perfect for a beginner to lace wigs.

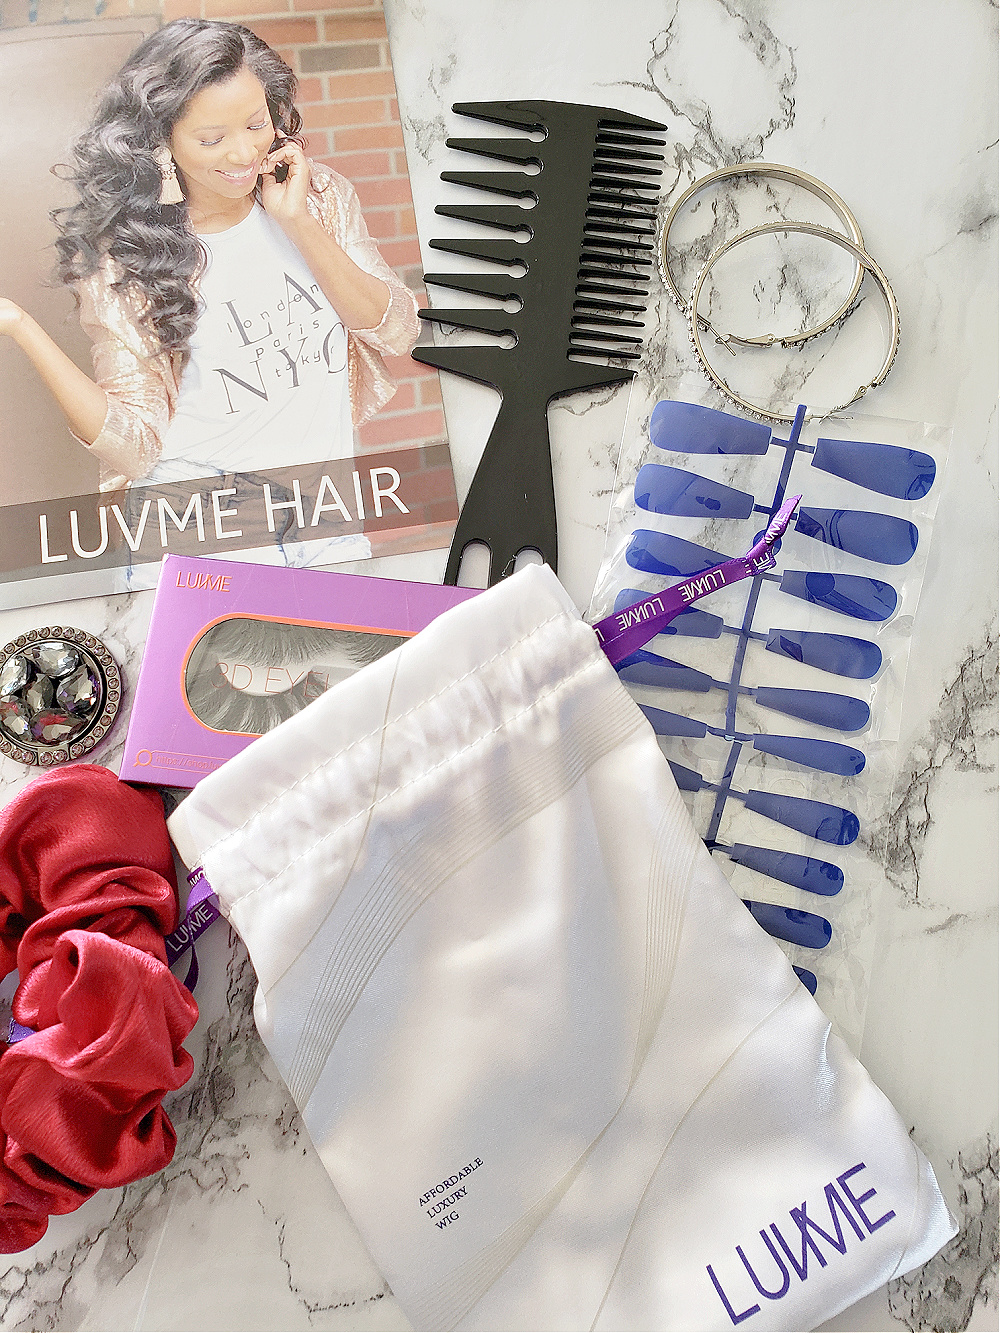
Materials Needed for the Install
Dual Edge Brush + Comb Combo
Scissors (Sharp Shears for Cutting Lace)
Paddle or Wig Brush
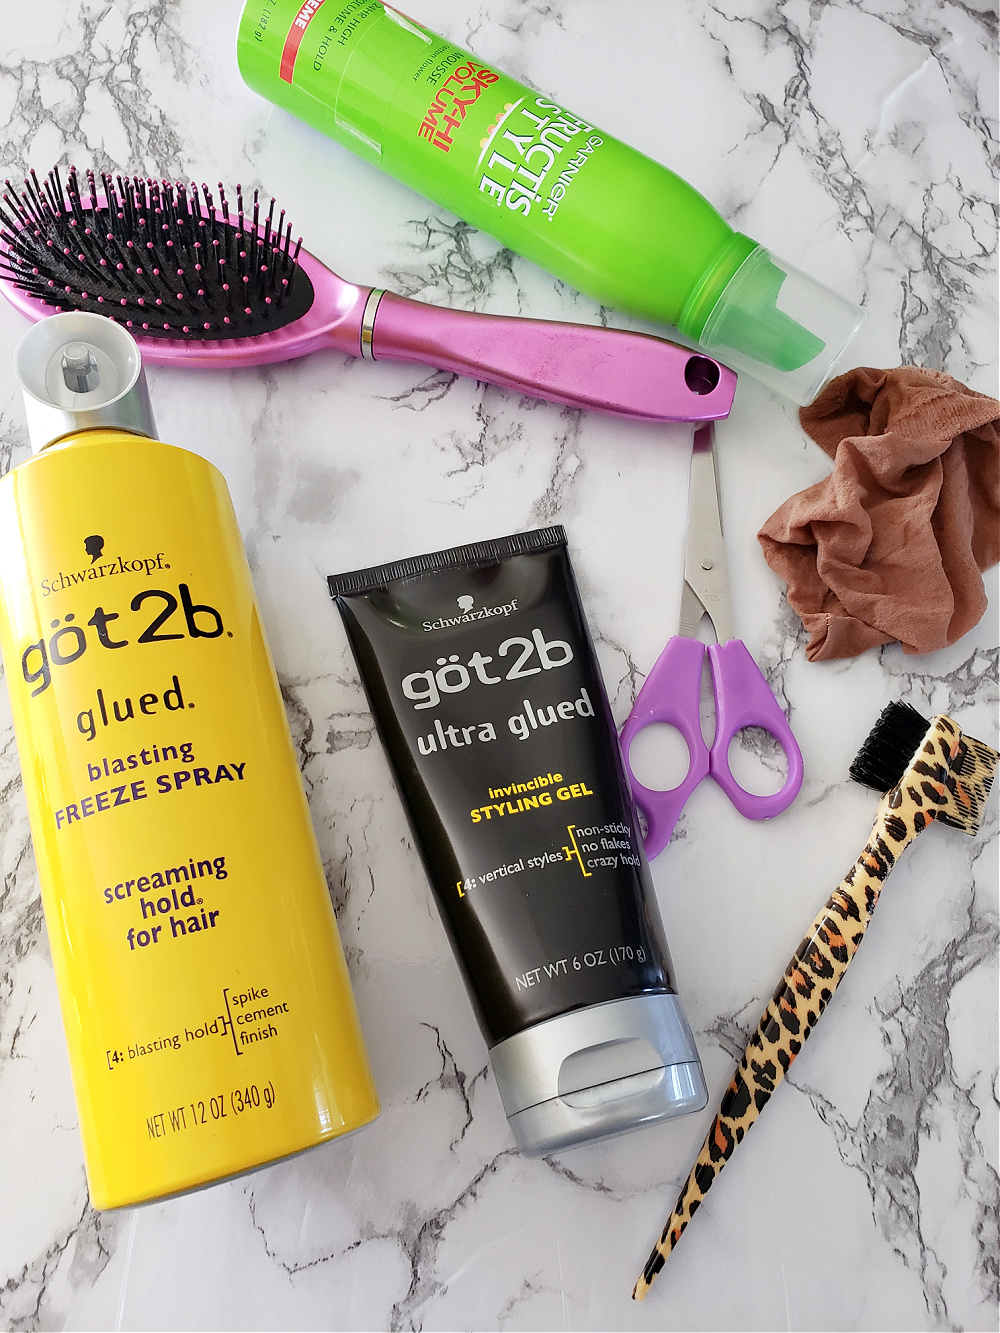
Got2B Glued Blasting Freeze Spray
Got2B Glued Invincible Styling Gel
Mousse
Wig Cap (optional)
Blow Dryer
Scarf (for laying edges)
How To Install the Wig
STEP ONE | Prep your hair for the wig. The idea is to get your hair underneath the wig as flat as possible, so that the wig rests smoothly on your head. This would be the time to slide on your wig cap if you plan to wear one.
STEP TWO | After making sure your hair is molded down flatly (and possibly under a cap), now is the time to secure the wig onto your head. Now, I don't use bonding glue, so for this tutorial we will be using freeze spray and gel to secure this wig. Spray Got2B Glued Blasting Freeze Spray around the front of your hairline where your lace wig will rest. After the spray becomes tacky (you can just use a blow dryer for a few seconds), place the wig on your head to the position of your liking. Make sure your wig band is secure in the back and your combs are placed comfortably in the front to ensure your wig lays perfectly.
STEP THREE | Once your wig feels secure and placed exactly as you'd like, it's time to cut the lace around the perimeter of your wig. Get as close to your hairline as you can with your shears. Once you're comfortable with how much lace you have removed from your wig from one ear tab to the other, spray more Got2B Glued Blasting Freeze Spray along the hairline for extra security. Take a scarf and tie along the hairline to keep everything in place for a few minutes.
STEP FOUR | Now that your wig is secure and your hairline is cut and laid, you can play with your hairline and part to make them look more realistic. I cut a few pieces near the hairline to make slight baby hairs around the perimeter. Then I use the dual end brush and Got2B Invincible Styling Gel to smooth the short hairs around my hairline to disguise the lace. Blow dry and tie up with the scarf to set. If you feel so inclined, add concealer to your part for a more realistic look.
STEP FIVE | Remove your scarf and style your wig. This is when you might want to touch up your curls, smooth your edges or the hair around your perimeter with a straightening comb, or protect your hair from any frizz with a slight application of mousse.
Hair Is Laid!
Here are the final results of my install. The style wears quite comfortably throughout the day and night. And even without glue, my hair stays in place until I remove it.


Where to Order
Visit LUVME Hair to take a look at all the beautiful looks the brand has to offer. They have an array of styles and lengths to satisfy your needs. To grab up the wig I'm rocking, click here. And if you want to see what wig is next on my purchase list, click here.
To save a few coins while shopping for your LUVME Hair wig, use coupon code "sodrewrites" at checkout! Using this code will save you 23% on your total purchase.
HAVE YOU LOOKED AROUND THE LUVME HAIR WEBSITE YET?
IF SO, WHAT'S YOUR FAVORITE LACE WIG ON THE SITE?